
Enjoy the delightful taste of perfection with our Perfect Waffle Mini recipe. Discover the secrets to making irresistibly crispy.
Ingredients:
- 1 cup all-purpose flour
- 2 tablespoons sugar
- 1 teaspoon baking powder
- 1/2 teaspoon baking soda
- 1/4 teaspoon salt
- 1 cup buttermilk
- 1/4 cup unsalted butter, melted
- 1 large egg
- 1/2 teaspoon vanilla extract
- Non-stick cooking spray
Instructions:
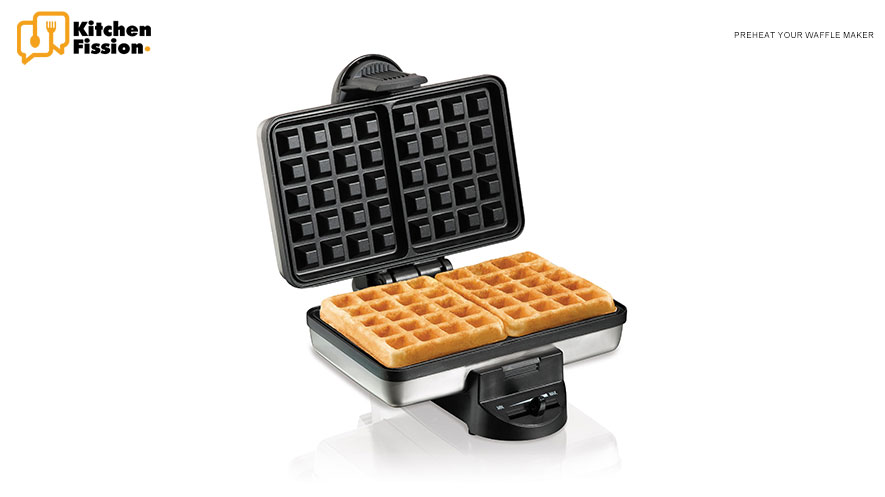
Preheat Your Waffle Maker:
Preheating your waffle maker is a crucial step in achieving perfectly cooked, golden-brown waffles with a crisp exterior and tender interior. This process involves heating the waffle iron to the appropriate temperature before pouring in the waffle batter. Here’s a detailed guide on why and how to preheat your waffle maker:
Why Preheat Your Waffle Maker:
- Even Cooking: Preheating ensures that the waffle plates are uniformly heated. This helps in cooking the waffle batter evenly from top to bottom, avoiding undercooked or burnt spots.
- Texture and Flavor: The initial burst of high heat from preheating helps create the desirable crispy exterior of waffles while maintaining a soft and fluffy interior. This contrast in texture is a hallmark of well-made waffles.
- Prevents Sticking: When the waffle maker is adequately heated, it forms a natural non-stick surface due to the cooking process. This reduces the likelihood of the waffle batter sticking to the plates and tearing apart.
How to Preheat Your Waffle Maker:
- Plug In: Start by plugging in your waffle maker and positioning it on a stable, heat-resistant surface.
- Select the Temperature Setting: Most waffle makers have adjustable temperature settings. Choose the setting that aligns with your waffle recipe. Typically, a medium-high heat setting works well for most recipes.
- Preheat Indicator: Some waffle makers have an indicator light or beep that lets you know when they are preheated. Wait for this signal before proceeding.
- Waiting Time: If your waffle maker doesn’t have a preheat indicator, a general rule of thumb is to allow it to heat for about 5-10 minutes. The time may vary depending on the specific model and its heating elements.
- Check the Temperature: If you’re uncertain about the readiness of your waffle maker, you can check the temperature by lightly sprinkling a few drops of water onto the hot plates. If the water sizzles and evaporates almost immediately, the waffle maker is likely ready.
- Grease or Spray: Once the waffle maker is preheated, open it and lightly grease the plates with a non-stick cooking spray or brush with melted butter or oil. This further ensures that your waffles won’t stick.
- Pour the Batter: Carefully pour the prepared waffle batter onto the hot plates, covering them evenly but not excessively to avoid overflow.
- Close the Lid: Close the waffle maker’s lid gently but firmly. The heat from the preheated plates will begin cooking the waffle immediately.
- Cook According to Recipe: Follow your waffle recipe’s recommended cooking time or until the waffles are golden brown and easily lift from the plates with a fork or spatula.
- Repeat the Process: For subsequent waffles, there’s typically no need to preheat the waffle maker again unless it cools significantly between batches.
Prepare the Batter:
Creating the ideal mini waffle starts with preparing the perfect batter. Whether you’re making traditional buttermilk waffles, Belgian waffles, or any other variety, the batter is the foundation of waffle excellence. Here’s a detailed guide on how to prepare the batter to ensure your mini waffles turn out fluffy, crisp, and delicious:
Ingredients:
- Flour: All-purpose flour is commonly used for waffles. It provides the structure and thickness needed for a substantial waffle.
- Baking Powder: Baking powder is a leavening agent that gives your waffles their characteristic rise and fluffiness.
- Sugar: A touch of sugar adds sweetness to the batter. The amount can be adjusted to suit your preference, but it’s typically a couple of tablespoons.
- Salt: Salt enhances the overall flavor of the waffle batter, balancing the sweetness and enhancing other ingredients’ taste.
- Eggs: Eggs provide structure, moisture, and richness to the batter. They also help with leavening.
- Milk: Milk adds moisture, creaminess, and richness to the batter. Whole milk or buttermilk is often used for a richer flavor, but you can use low-fat or dairy-free options if preferred.
- Oil or Melted Butter: Oil or melted butter contributes to the waffles’ tenderness and flavor. Butter lends a rich, buttery taste, while oil can create a lighter texture.
- Vanilla Extract: A dash of vanilla extract adds a pleasant aroma and a hint of sweetness to the batter.
Steps to Prepare the Batter:
- Gather Ingredients and Equipment:
- Collect all the necessary ingredients and measuring cups and bowls.
- Preheat Waffle Maker:
- Begin by preheating your mini waffle maker as per the manufacturer’s instructions. This ensures that it’s hot and ready when the batter is prepared.
- Mix Dry Ingredients:
- In a large mixing bowl, combine the flour, baking powder, sugar, and salt. Whisk them together until well incorporated. Sifting the dry ingredients can help prevent lumps.
- Whisk Wet Ingredients:
- In a separate bowl, whisk the eggs until they are well beaten. Add the milk, oil or melted butter, and vanilla extract. Whisk until these wet ingredients are thoroughly combined.
- Combine Wet and Dry Ingredients:
- Pour the wet ingredients into the bowl with the dry ingredients. Use a spatula or wooden spoon to gently mix them together. Be cautious not to overmix; a few lumps are okay. Overmixing can lead to tough waffles.
- Let the Batter Rest (Optional):
- If time allows, let the batter rest for a few minutes. This can help the flour fully hydrate, resulting in a smoother batter and potentially fluffier waffles.
Combine Wet Ingredients:
Creating the perfect mini waffle involves a series of well-executed steps, and one of the crucial stages is combining the wet ingredients. This step plays a significant role in achieving the ideal texture and flavor of your mini waffles. Here’s a detailed guide on how to properly combine the wet ingredients for perfect mini waffles:
Ingredients for Wet Mixture:
- Eggs: Eggs provide structure and moisture to the waffle batter. They also contribute to the waffles’ richness and help with leavening.
- Milk: Milk adds moisture and creaminess to the batter. It is a key ingredient for achieving the desired waffle texture.
- Oil or Melted Butter: Oil or melted butter contributes to the tenderness and flavor of the mini waffles. The choice between the two can impact the texture and taste of the waffles.
- Vanilla Extract (Optional): A small amount of vanilla extract is often used to enhance the aroma and add a subtle sweetness to the waffles.
Steps to Combine Wet Ingredients:
- Select a Mixing Bowl:
- Choose a bowl large enough to comfortably hold all the wet ingredients. It should allow for easy whisking and prevent spillage.
- Crack and Beat the Eggs:
- Begin by cracking the required number of eggs into the mixing bowl. Use a fork or a whisk to beat the eggs thoroughly until the yolks and whites are well combined. Beating the eggs helps ensure even distribution of their moisture and proteins in the batter.
- Add Milk:
- Pour the milk into the bowl with the beaten eggs. Use whole milk or buttermilk for a richer flavor, although you can also use low-fat or dairy-free alternatives if preferred. The milk adds creaminess and moisture to the mixture.
- Incorporate Oil or Melted Butter:
- Add the specified amount of oil or melted butter to the bowl. Oil can create a lighter texture in the waffles, while butter contributes a rich, buttery taste. Use a spatula or whisk to incorporate the oil or butter into the mixture.
- Add Vanilla Extract (if desired):
- If your recipe calls for it, add a dash of vanilla extract to the wet ingredients. Vanilla extract enhances the aroma and adds a subtle sweetness that complements the other flavors in the waffle batter.
- Whisk Until Smooth:
- Whisk the wet ingredients together until they are well combined and the mixture appears smooth and homogeneous. Ensure that there are no visible streaks of egg yolk or pockets of oil or butter.
Properly combining the wet ingredients is a critical part of the mini waffle-making process. It sets the stage for creating a batter that is well-mixed, flavorful, and has the right moisture content to yield delicious, tender, and perfectly cooked mini waffles.
Mix Wet and Dry Ingredients:
Pour the wet ingredients into the dry ingredients. Stir until just combined. It’s okay if there are a few lumps in the batter. Be careful not to overmix, as this can make the waffles tough.
Prep the Waffle Maker:
Achieving the perfect mini waffle starts with properly prepping your waffle maker. This essential step ensures that your waffles cook evenly, release easily, and come out with the desired texture. Here’s a detailed guide on how to prep the waffle maker when making perfect mini waffles:
Cleaning the Waffle Maker:
- Cool Down: If your waffle maker was recently used, allow it to cool down completely before cleaning or prepping it for a new batch of waffles. This prevents accidental burns or injuries.
- Unplug the Waffle Maker: Always unplug the waffle maker from the power source before cleaning or handling it.
- Remove Excess Crumbs: Gently shake or use a soft brush to remove any loose crumbs or debris from the waffle iron’s plates. This prevents burnt bits from affecting the flavor of your new waffles.
- Wipe the Plates: Using a clean, damp cloth or paper towel, wipe the cooking plates to remove any residual grease or batter. Make sure the cloth is damp, not soaked, to avoid getting excess moisture into the electrical components.
Preheating the Waffle Maker:
- Plug In and Preheat: Plug in your waffle maker and set it to the desired temperature setting. Mini waffle makers typically have temperature dials or buttons to adjust the heat (Perfect Waffle Mini). Preheat it according to the manufacturer’s instructions and the recipe you’re using. Preheating ensures that the plates are evenly heated, which is crucial for even cooking.
- Preheat Indicator: Some waffle makers have a preheat indicator light or a beep that signals when they’ve reached the correct temperature. Wait for this signal before proceeding if your waffle maker has one.
Greasing the Waffle Maker(Perfect Waffle Mini):
- Check Non-Stick Coating: Many modern waffle makers have non-stick cooking surfaces that require minimal greasing. Check your waffle maker’s instructions to determine whether it needs greasing. Some may recommend a light coating of cooking oil or non-stick cooking spray before each use.
- Use Cooking Spray or Oil (if needed): If your waffle maker does require greasing, use a non-stick cooking spray or a pastry brush to lightly coat the plates with a thin layer of oil. Be cautious not to over-grease, as excessive oil can lead to a mess and affect the waffle’s texture.
Using the Right Amount of Batter:
- Portion the Batter: Once your waffle maker is properly preheate and grease (if need), use a ladle or measuring cup to portion the batter onto the hot plates. Be mindful not to overfill, as excess batter can overflow and create a mess.
- Close the Lid Gently: Close the lid of the waffle maker gently but securely to avoid spilling or uneven cooking.
Cooking and Removing the Waffles:
- Follow Recipe Instructions: Cook the mini waffles according to your recipe’s recommended time or until they are golden brown and crisp. Cooking times may vary based on your waffle maker’s heat settings.
- Carefully Remove: Use a fork or spatula to carefully remove the cooked mini waffles from the waffle maker. Be cautious of the hot plates.
By properly prepping your waffle maker, you ensure that your mini waffles cook to perfection, are easy to remove, and have the desired texture and flavor. These steps contribute to a delightful waffle-making experience and a delicious breakfast or snack.

Cook the Waffles (Perfect Waffle Mini):
Pour a small amount of batter (usually about 1/4 cup) onto the center of the waffle maker. Close the lid and cook according to the manufacturer’s instructions, usually for about 2-4 minutes or until the waffles are golden brown and crisp.

Check for Doneness:
Open the waffle maker carefully to check if the waffle is done (Perfect Waffle Mini). If it’s not golden brown yet, close the lid and cook for another minute or so.
Remove and Serve:
Use a fork or a spatula to carefully remove the mini waffle from the maker. Place it on a plate and keep it warm in a low oven (around 200°F or 95°C) while you cook the remaining waffles.
Repeat:
Continue cooking waffles with the remaining batter, greasing the waffle maker as needed to prevent sticking.
Serve and Enjoy (Perfect Waffle Mini):
Serve the mini waffles hot with your favorite toppings like maple syrup, fresh fruit, whipped cream, or chocolate chips. Enjoy!
Remember to follow your specific waffle maker’s instructions for best results, as cooking times and temperatures may vary slightly.